Access
To access Settings, click the Settings toggle in the left navigation.
Calendar > Scheduling
Scheduling is the first option under Calendar in Settings.
You can control calendar availability for when customers can schedule appointments via the Steer CRM scheduler.
First, choose- how long you would like appointments to last (30 minutes or 1 hour)
- If you would like to Approve All Appointments Automatically or Manually accept Appointment Requests before they become confirmed.
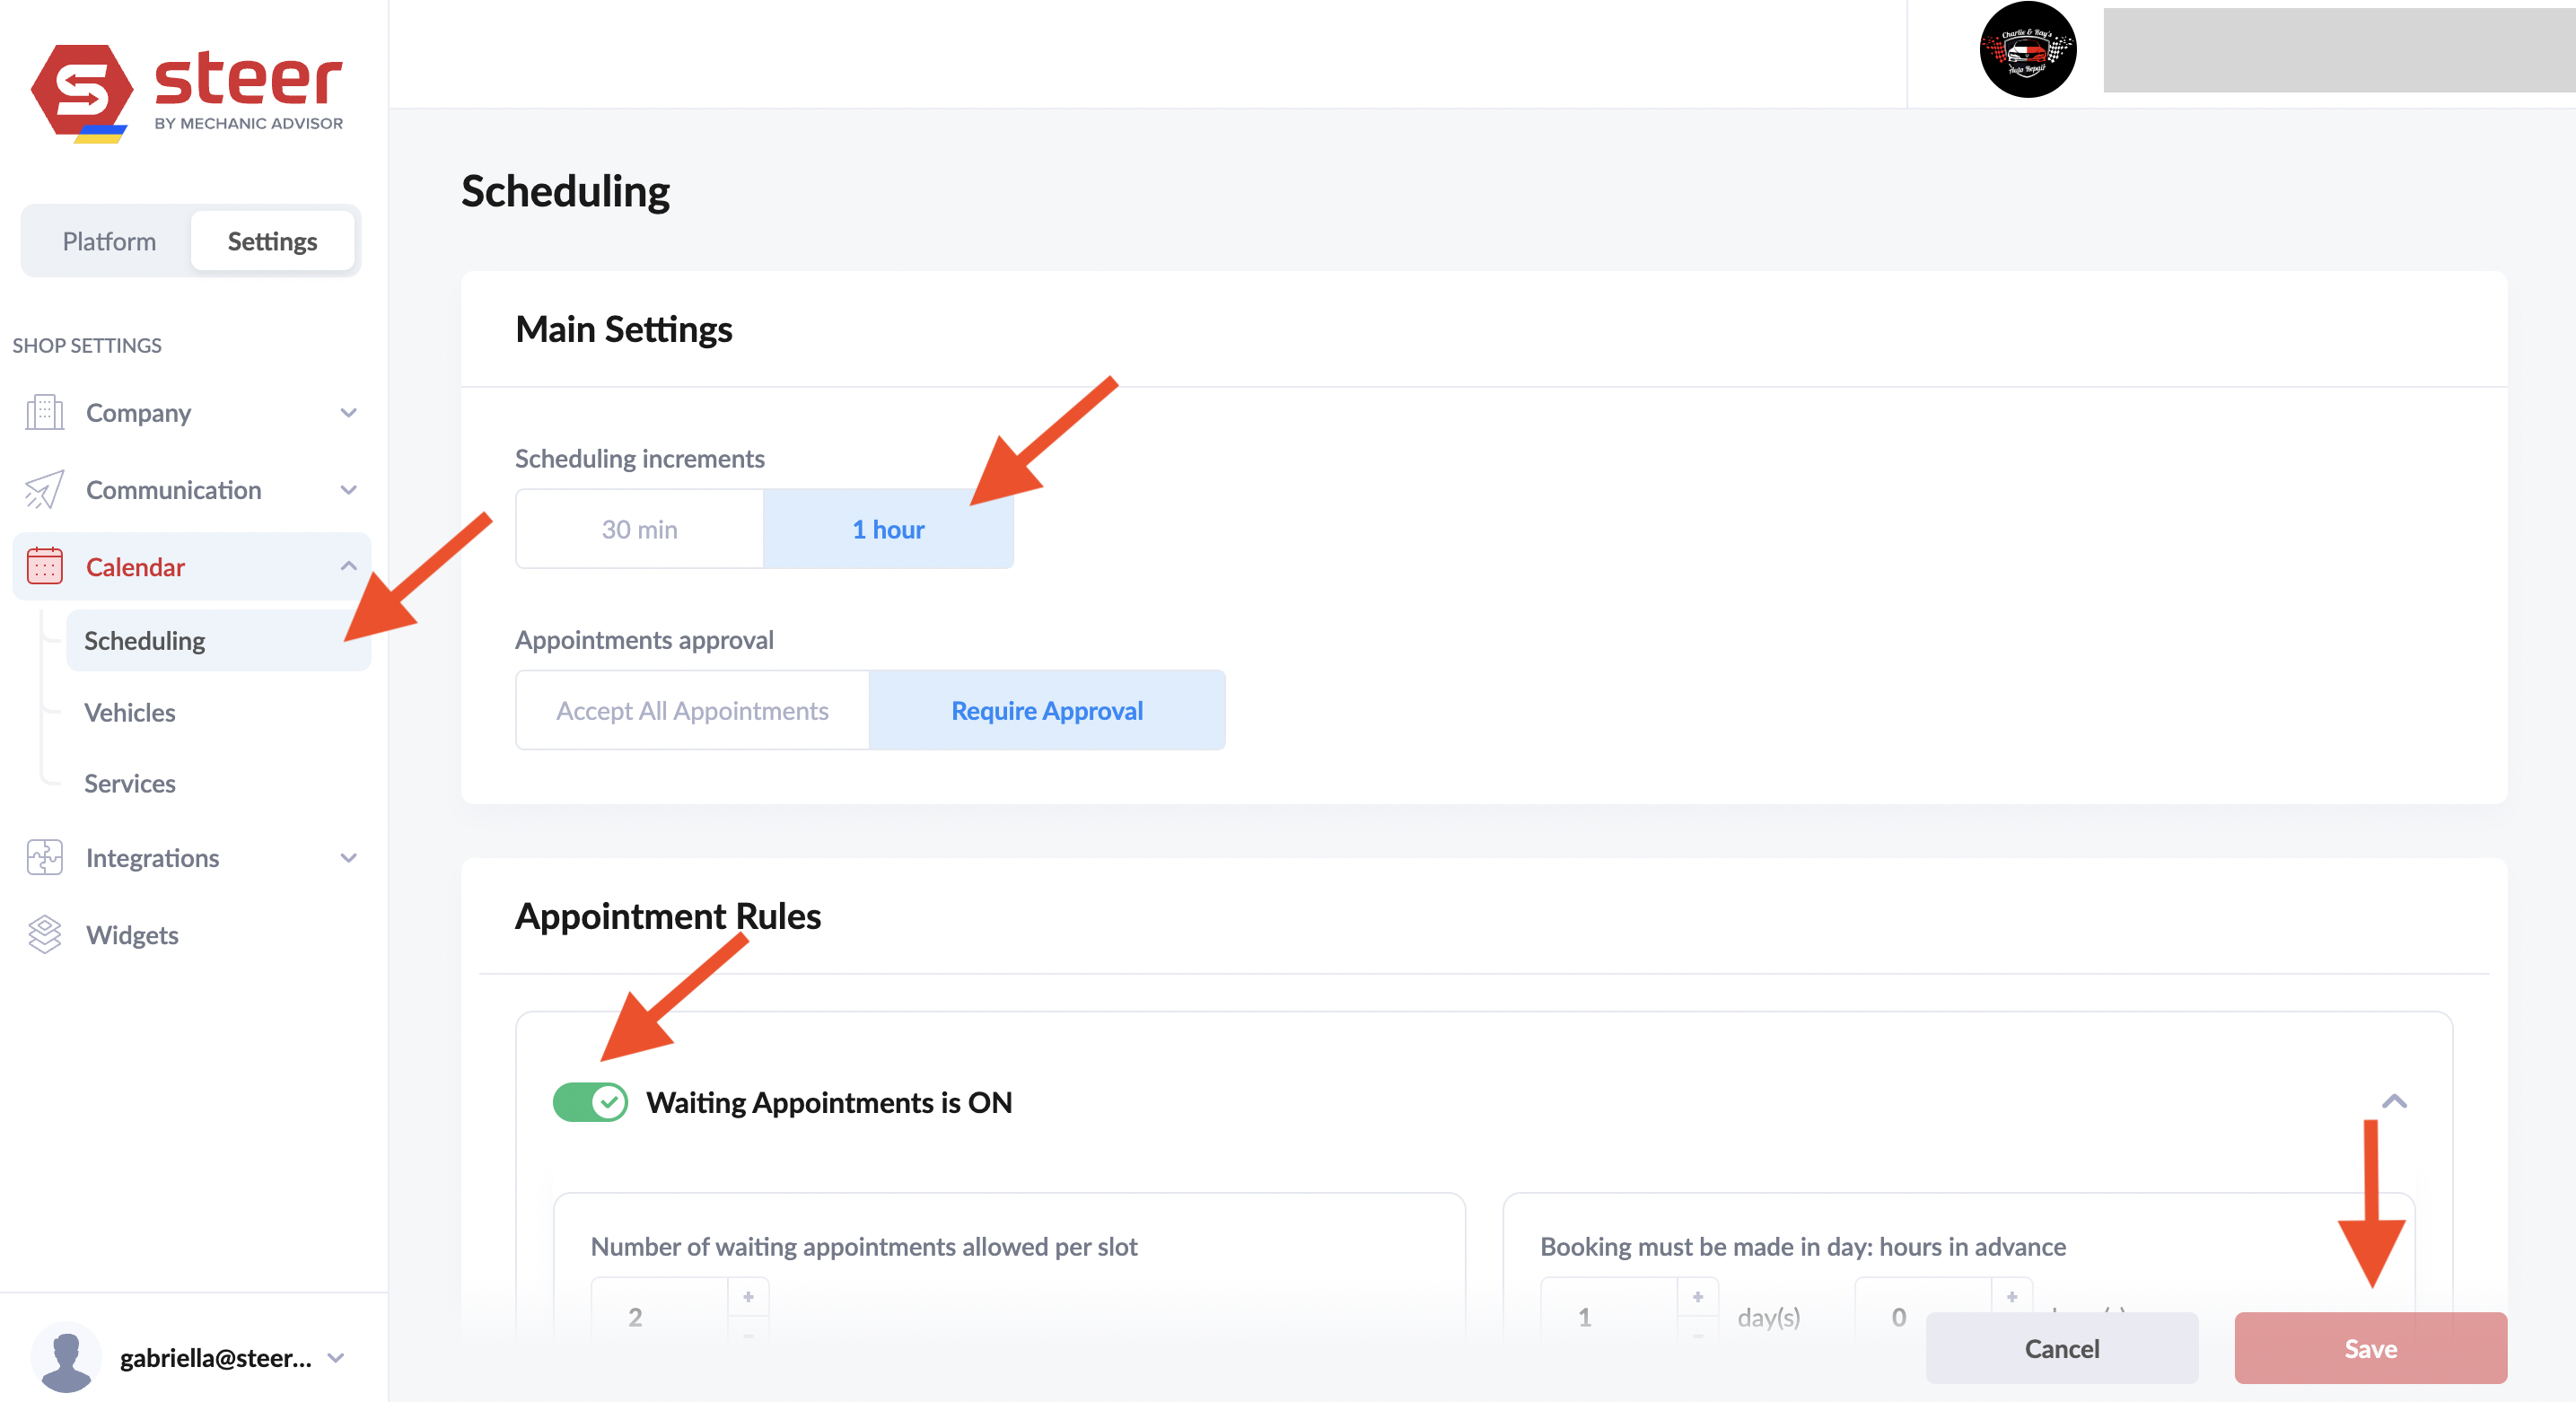
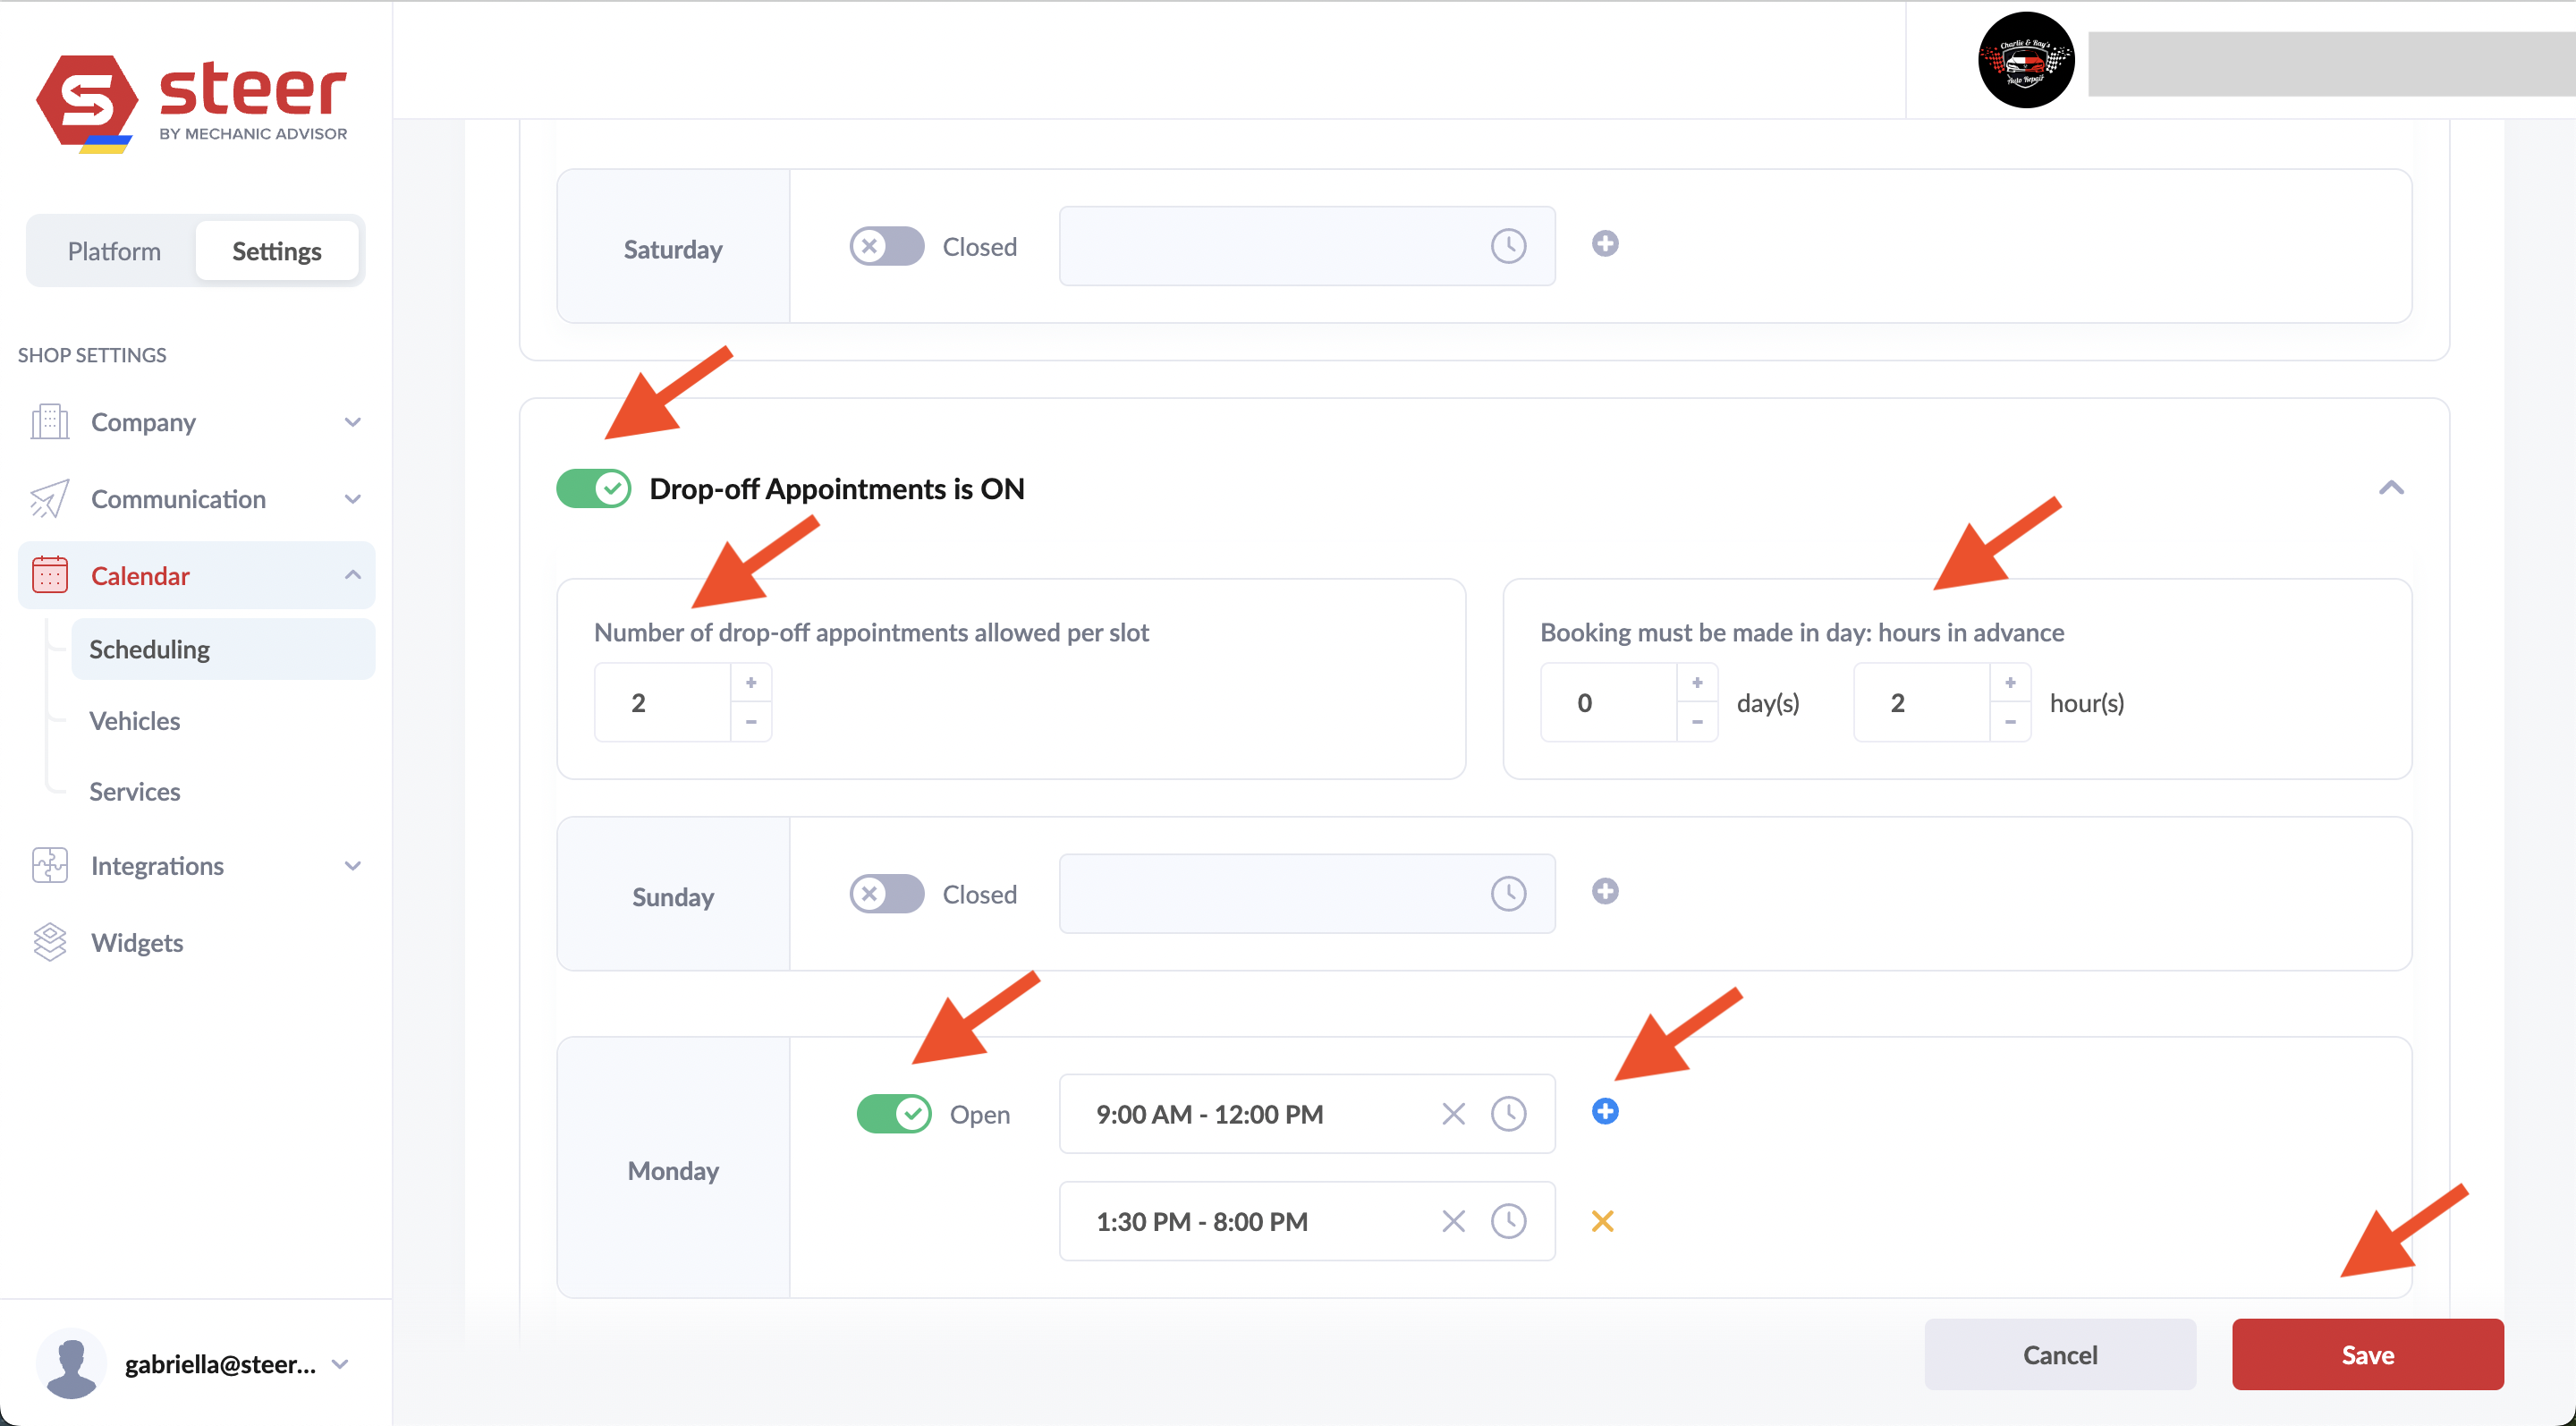
Scroll down see Appointment Rules for , you can set:
- Number appointments allowed per a slot (for example if 2 appointments are allowed per a slot and appointments are set-for 1 hour, then you can have 2 appointments for every half hour).
- The number of hours/days before an appointment the booking must be made. For example:
- if set-for 3 hours than, a 9 AM appointment must be made by 5:50 AM the same day
- if set for 2 days, then a 9 AM appointment must be made by 11:59 PM 2 calendar days before. E.g. a Monday 9 AM appointment would need to be booked by Saturday at 11:59 PM.
- For each day of the week you can toggle ON and OFF opening hours. For each day of the week you can set a start time and end time. Click the blue plus to add a second block of opening hours for the same day. This allows for breaks during the day.
- Scroll down to do the same for Drop-off appointments.
Calendar > Vehicles
Vehicles is the second option under Calendar in Settings.
Control which vehicle makes customers can book appointments for. Any vehicle make not checked here will not be bookable. To remove a vehicle make, uncheck it.
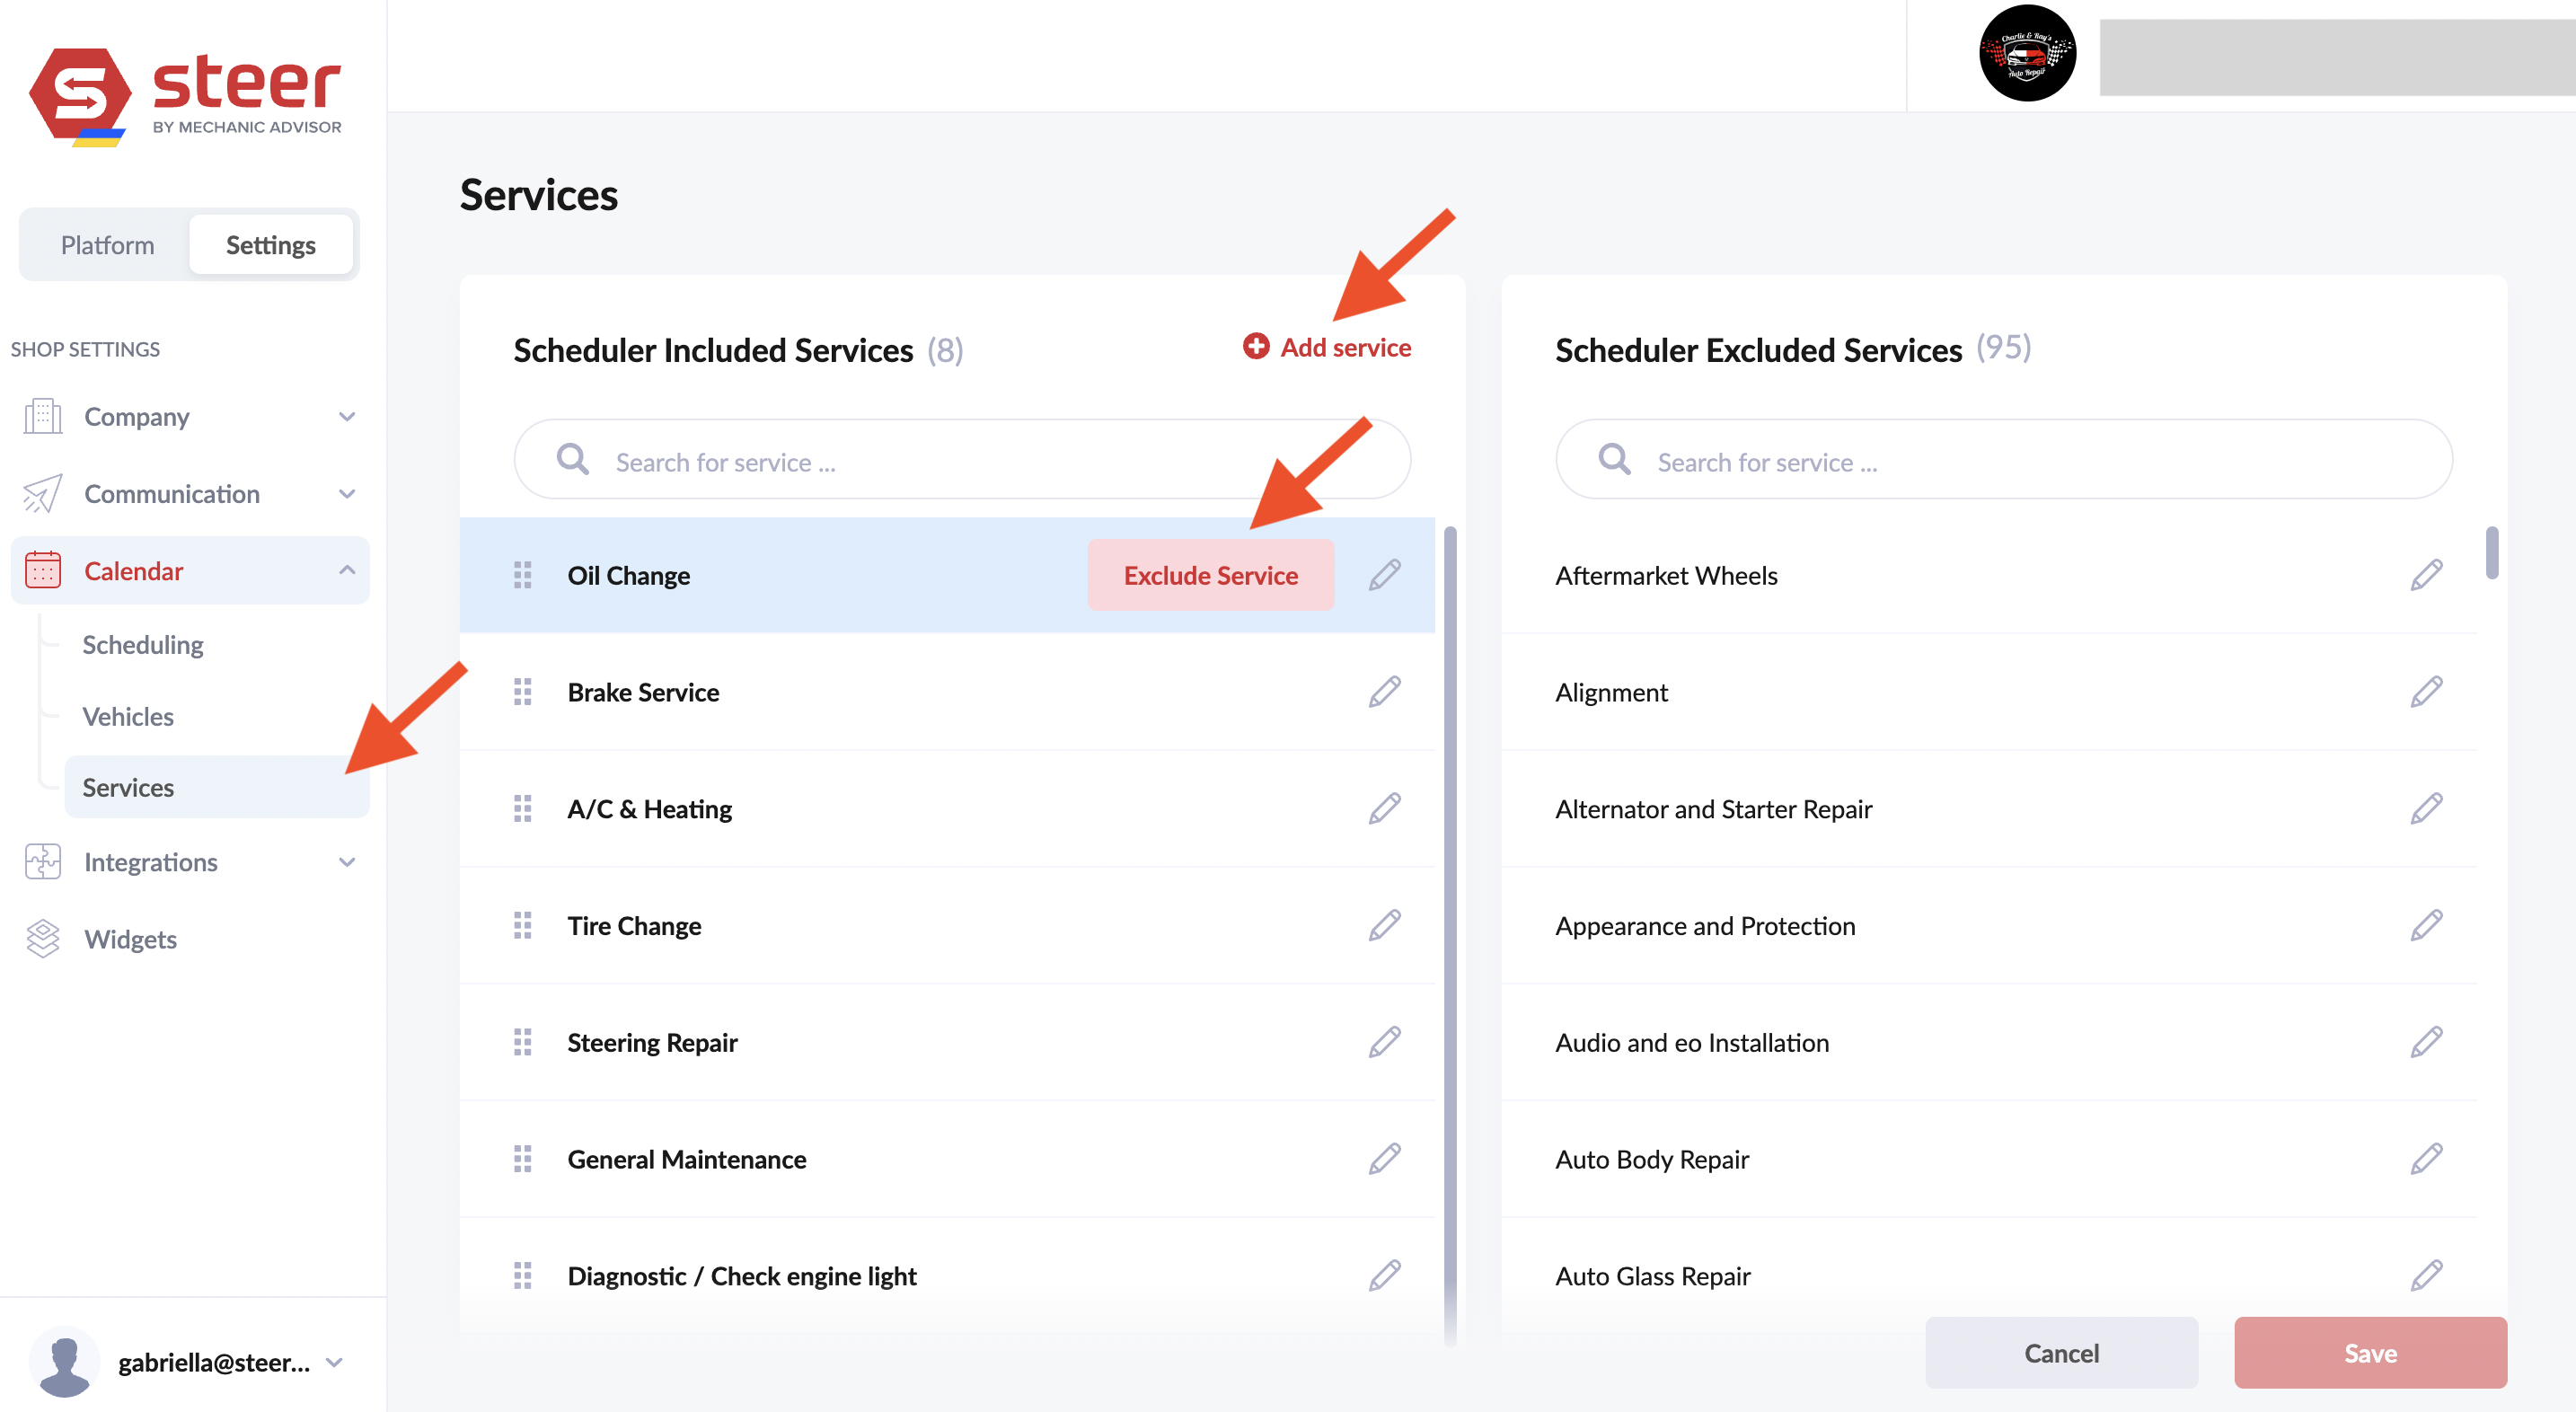
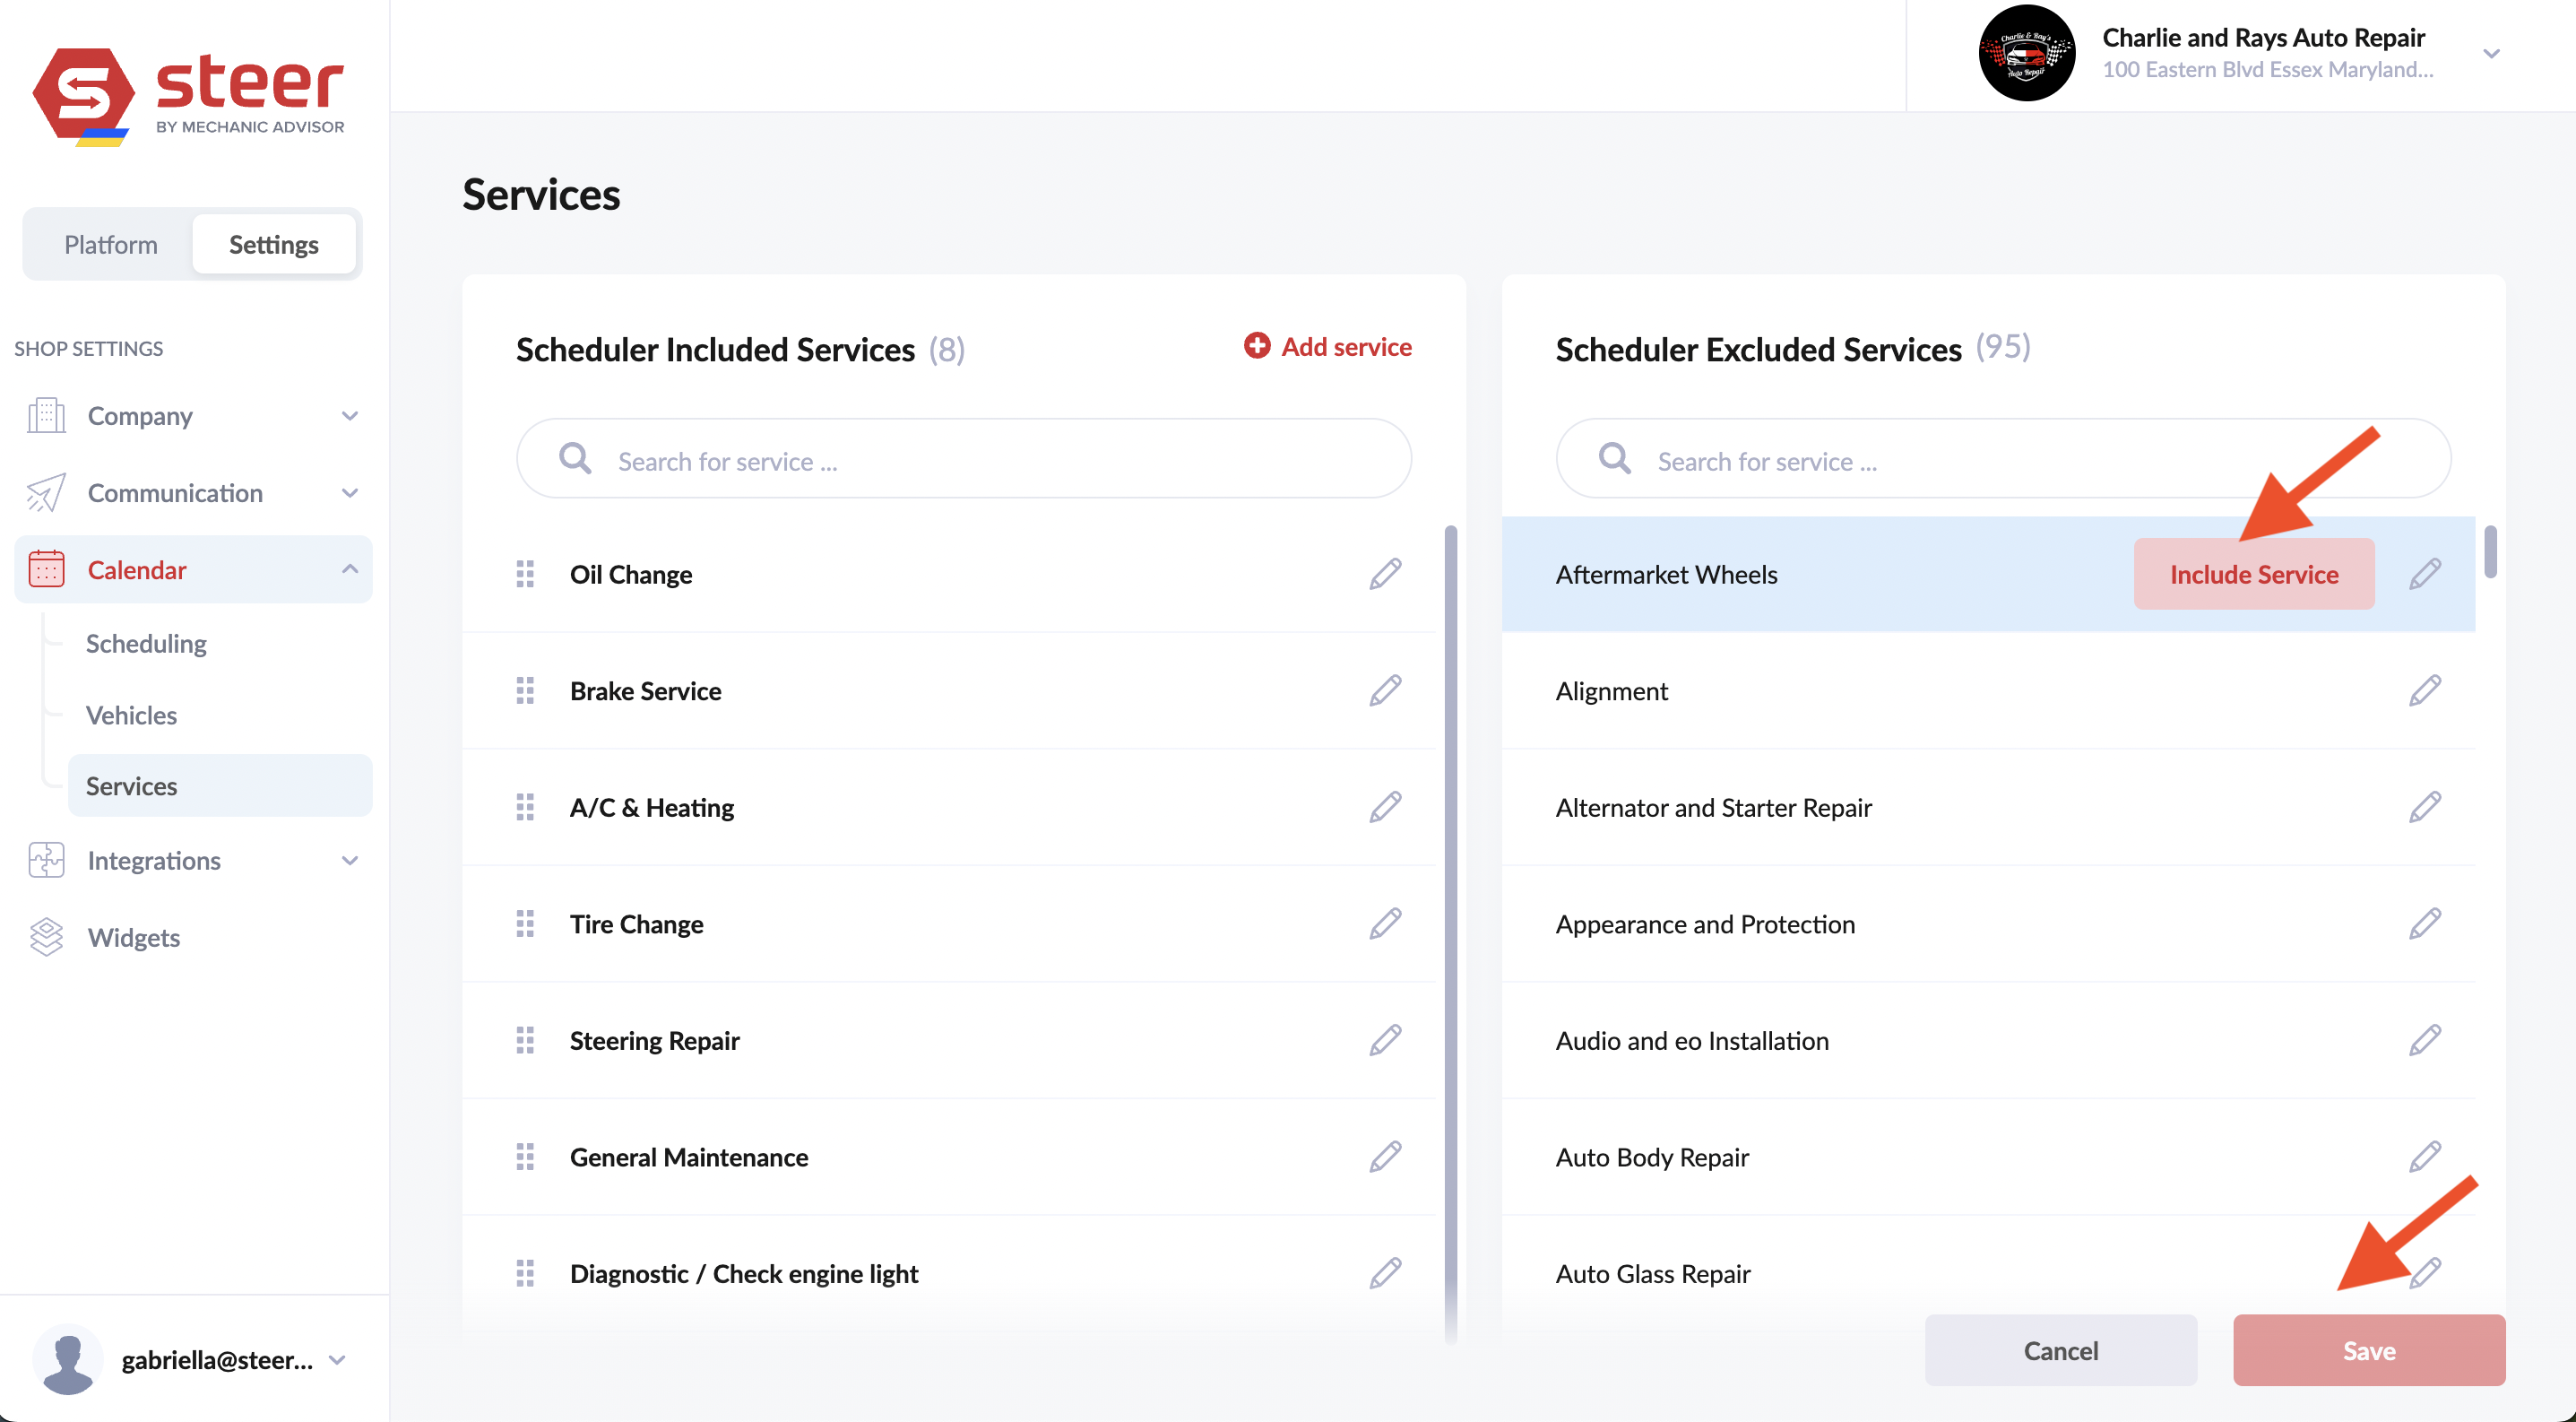
Calendar > Services
Services is the Third option under Calendar in Settings.
Control which services customers can book appointments for. Any service not in the left column of included services will not be bookable in the Steer CRM scheduler.
- To exclude a service, hover over it on the left column and click Exclude Service.
- To include a service, hover over it on the right column and click Include Service.
- To create a new service, click "+ Add Service" at the top of the Included Services left column.
- To Edit the name of a service, click the pencil icon.