Marketing Companies: If you’re working with a marketing company, AutoOps will handle the installation process for you during onboarding.
Do It Yourself Websites: If you're managing your own website, AutoOps will email you the required setup details. You'll receive the script and code needed for integration.
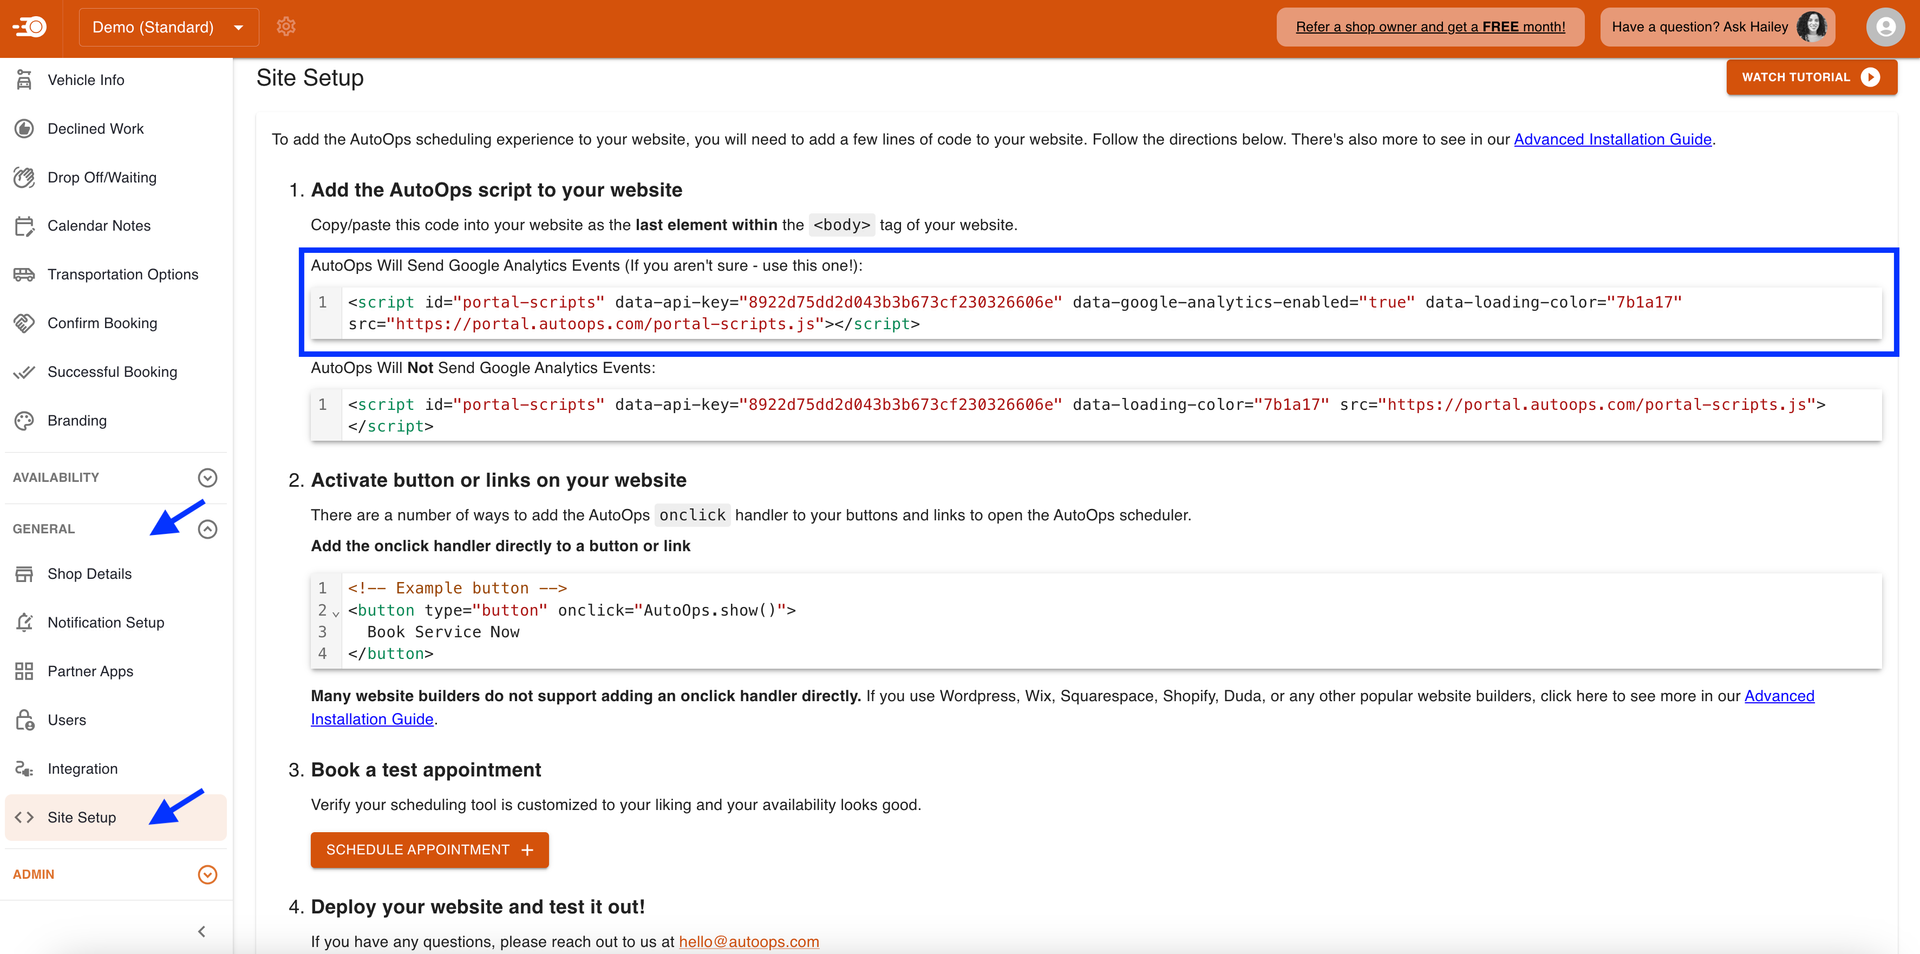
The Site Setup page (General > Site Setup), provides all the necessary information for installing AutoOps on your website.
Need help integrating the code into your website? Check out these step-by-step guides for popular CMS platforms. Click Here to see our Advanced Installation Guide
Important Information for Installation:
-
Main Script Tag: This is the key script tag you need to add to your website for AutoOps to function properly. Copy/paste this code into your website as the last element within the <body> tag of your website.
-
Google Analytics Integration: Most users integrate AutoOps with Google Analytics to track events and appointments. The script provided includes this functionality.
-
Button Code: There are a number of ways to add the AutoOps onclick handler to your buttons and links to open the AutoOps scheduler.
Test Your Setup
-
Book a Test Appointment: After integrating the code, you can book a test appointment to see how it looks and functions on your website. This step helps ensure the system is working smoothly before you go live.
Need Assistance?
-
If you have any questions or run into issues, you can reach out via:
-
Email: hello@AutoOps.com
-
Support: Click on the support button in your dashboard for further help.
-