This guide walks you through the Auto-Ops site manager to set up your new auto shop website, covering everything from importing business details to selecting your design template, and to the last step of producing your preview site.
Step 1: Import Your Google Business Listing
Step 2: Import an Existing Website (Optional)
Step 3: Complete Business Information
Step 4: Add Additional Business Details and Services
Step 6: Select Website Features
Step 7: Configure Enabled Features
Final Step: Review Website Setup
Start by clicking Start a New Site when logged into the AutoOps Dashboard under AutoOps Sites.

Step 1: Import Your Google Business Listing
The first step is to establish your business identity by pulling information from Google.
-
Search for Your Business: Find your auto shop on Google.
-
Import Listing: Use this step to import your Google Business Listing.
-
Multi-Location Shops: If you have multiple locations, import each Google Business Listing so that your website includes information about all your locations.
This helps pre-fill content into your site manager form to save you time in future steps of this process.

Step 2: Import an Existing Website
If you already have a website, you can import its content to pre-populate your new site.
-
Select "Yes" to Import: If you have an existing website, select "yes" and type in your domain name to import its content.
- This will pre-fill content for the upcoming steps of the site manager.
-
Select "No" to Skip: If you currently do not have a website, select "no, I don't have a website" and continue.
- You will manually fill in content for the upcoming steps of the site manager.

1. Input your current website domain.
2. Click Import Website Content.
3. Save.
Continue: Proceed to the next step.
Step 3: Complete Business Information
This step ensures all the foundational text for your website is in place.
-
Pre-Filled Data: If you imported a Google Business Listing (Step 1) or an existing website (Step 2), this form will be pre-filled with that information.
-
Empty Form: If you did not import any information, this form will be empty.
-
Add Location Information: If you have multiple locations or websites, you can add additional location details here.

Continue: Proceed to the next step.
Step 4: Add Additional Business Details and Services
This section allows you to customize your website's content and ensure it accurately reflects your shop.
-
Review and Edit: If information was imported from your Google listing or old website, you can edit and update it here.
-
Key Details to Add: Fill in information like your business history, what makes your shop special, your target customers, and the specific services your shop offers.
-
Exclude Services: Include any services you do not offer. This ensures they are not mistakenly displayed on your new website.


Continue: Proceed to the next step.
Step 5: Choose Your Template
Select a design that best fits your shop's brand and desired look.
-
Browse Templates: Review the pre-built templates available.
-
Filter and Select: Look through all templates and categories to find the design that best fits your shop's brand and aesthetic.

Continue: Proceed to the next step.
Step 6: Select Website Features
Choose which functional components you want to enable on your website.
-
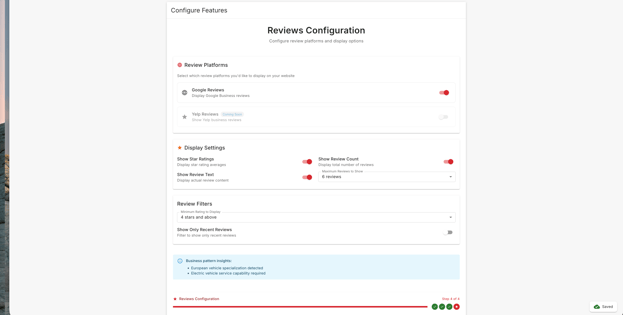
Enabled Features: Features like Reviews and the Auto-Ops Scheduler are typically enabled by default.
-
Select Additional Features: Choose any other features you want to include, such as:
-
Multiple business locations
-
Services and vehicles lists
-
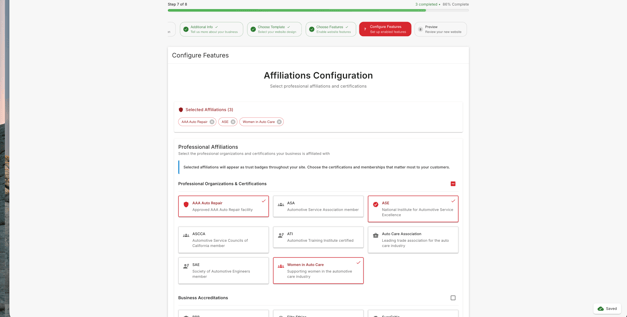
Affiliations (e.g., AAA, ASE)
-
Coupons
-
Etc.
-

Continue: Be sure to select all desired features before moving on.
Step 7: Configure Enabled Features
Now you will input the specific content for the features you selected in the previous step.
-
Sequential Configuration: This step will walk you through configuring each enabled feature in order.
-
Complete the List: You will need to complete all the configuration items on the list.
-
Flexibility: You can go back at any time to edit and adjust the configurations.
Final Step: Review Website Setup
Once all steps are complete, you will move to the final page to review your website setup before publishing. Confirm your website information on this page.

If all of your information looks accurate, click Provision Website and our system will build your site preview based on the information you input.

Our team will reach out for review and approval as soon as your preview website is ready!