
Campaign Builder gives you one place to create and manage your marketing campaigns. Whether you're starting from a template, reusing a previous campaign, or building something new, you can set up your campaign in the order that works best for you.
Your progress saves automatically as you work, so you can start a campaign now and finish it later.
This guide walks you through creating a campaign, selecting your audience, setting up your sending schedule, and launching your campaign.
Jump to:
Viewing and updating a draft campaign
Creating a campaign across multiple locations
Creating a new campaign
|
|
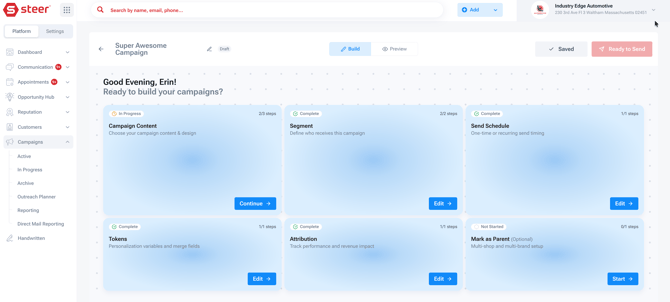
- Campaign Content: Create your email or text message.
- Segment: Choose which customers will receive your campaign.
- Send Schedule: Set when your campaign will be sent.
- Attribution: Review how campaign results will be tracked.
- Tokens: Reference the personalized information available for your messages.
- Bulk Creation: Create campaigns across multiple locations, if available for your account.
Each section displays its progress so you can see what's complete and what still needs attention.
Tip: You don't need to complete these sections in order. You can work on any section and return to the others whenever you're ready.
Name your campaign
- Click the pencil icon next to the campaign name at the top of the page.
- Enter a name that helps you identify your campaign.
- Save the name.
Choose a descriptive name, such as "November Oil Change Special" or "Winter Maintenance Reminder," so you can easily find the campaign later.
A campaign name is required before moving it to Ready to Send.
Creating Your Campaign Content
Choosing your Campaign content
- In Campaign Builder, select Start under Campaign Content.
- Choose whether you want to create an Email or Text campaign.
- Continue to the content editor.
-
If you're using a template, browse the available categories to find a design that fits your campaign.
-
Select the template you want to use to open the email editor.
-
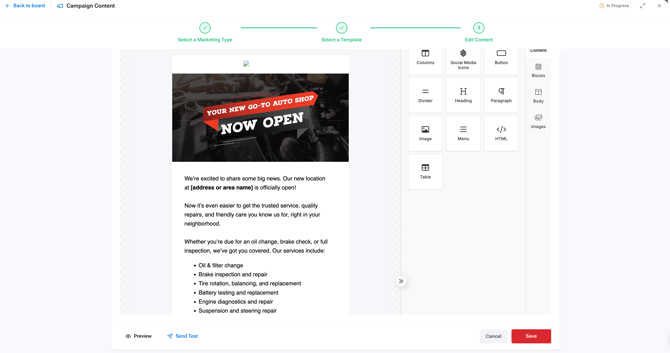
Use the campaign editor to make your message your own.
- Update the message text with your offer or announcement.
- Add or change images, buttons, and other content.
- Customize the layout and design.
- Add your email subject line and preheader text.
- Preview your message before saving.
Email and text campaigns are created separately. If you want to reach customers through both channels, you'll need to create an individual campaign for each.
Choosing your Campaign Segment
After choosing your campaign type, select the customers you want to reach.
You have two options:
Option 1: Use an Existing Segment
- Select Use Existing.
- Browse the available customer segments.
- Choose the segment you want to use.
- Review the segment details before confirming.
Only segments associated with your selected campaign type will appear.
Option 2: Create a New Segment
- Select New Segment.
- Use Smart Search and available customer filters to define your audience.
- Review your selected filters and customer count.
- Confirm your segment to add it to your campaign.
Tip: Before continuing, review your customer count and filters to make sure you're reaching the intended audience.
Set Your Sending Schedule
The Send Schedule section controls when your campaign will go out.
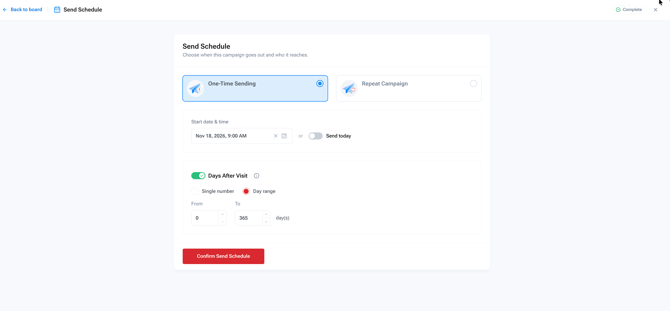
- Select Start under Send Schedule.
- Choose whether your campaign will send one time or repeat.
- Configure the available scheduling options.
- Save your schedule.
For one-time campaigns, select when you want the message to be sent.
For repeating campaigns, configure the recurring schedule that matches your outreach.
Important: Text campaigns scheduled outside the 8 AM to 6 PM sending window will display a warning. Review this warning before launching your campaign.
Review Available Tokens
Tokens let you personalize campaign messages using information associated with your shop or customers.
- Open the Tokens section.
- Review the available tokens and their uses.
- If you need to make changes, select Manage Tokens.
You can also manage tokens from Admin > Communication > Tokens.
Once you've reviewed the available tokens, you can mark this section complete without leaving Campaign Builder.
Review Attribution Settings
Attribution settings help Steer track the results associated with your campaign.
- Open the Attribution section.
- Review the existing attribution settings.
- Make any necessary changes.
- Select Confirm Settings.
Attribution is configured by default, so you can keep the existing settings if they meet your needs.
Viewing and updating a draft campaign
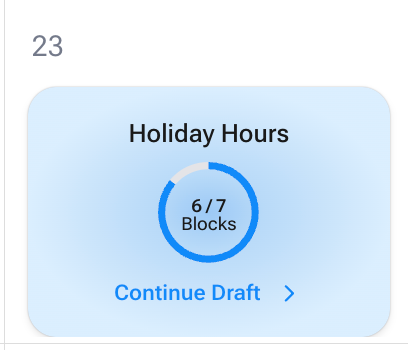
Your changes save automatically as you build your campaign.
If you need to stop before finishing, you can leave Campaign Builder and return to your campaign later.
|
 |
You can also continue working on a campaign from the In Progress list.
- Navigate to Campaigns > In Progress.
- Find your unfinished campaign.
- Open the campaign to continue editing.
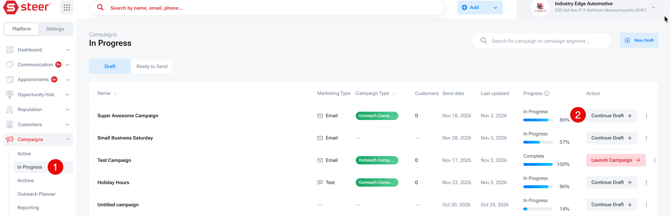
You can return to any section that still needs attention.
Launching your campaign
Once you've completed your campaign setup, you can save it as Ready to Send.
- Review your campaign content, segment, and schedule.
- Make sure the required sections are complete.
- Click Ready to Send.
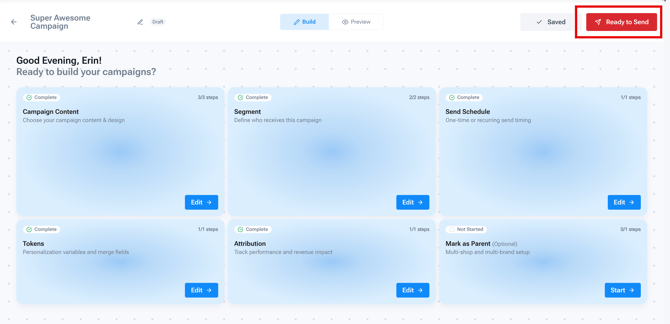
Your campaign will appear under Campaigns > Ready to Send.
Important: Moving a campaign to Ready to Send does not send it to customers. The campaign remains saved until you launch it.
When you're ready for your campaign to go out:
- Open your completed campaign.
- Review your content, audience, and sending schedule.
- Click Launch Campaign.
- Complete any confirmation steps displayed.
Your campaign will move to Active.
Creating Campaigns Across Multiple Locations
For multi-location organizations, Campaign Builder lets you create a parent campaign and distribute copies across your locations.
Each location receives its own campaign, while tenant administrators can manage shared content and make location-specific changes.
Availability: Bulk campaign creation is currently limited to enabled multi-location accounts.
Step 1: Create a Parent Campaign
- Open Campaign Builder.
- Select the Mark as parent section.
- Toggle on Mark as parent.
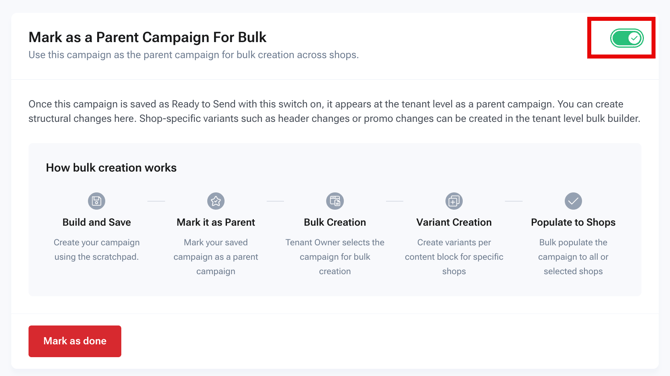
You can also access parent campaigns from Tenant > Campaigns > Parent Campaigns.
Important: A parent campaign must be Ready to Send before it can be used to build campaigns for individual locations.
Step 2: Build Campaigns for Your Locations
- Navigate to Tenant > Campaigns > Parent Campaigns.
- Select the Active parent campaign you want to distribute.
- Start the bulk creation process.
- Select the applicable locations and review the campaign setup.
- Complete the build.
Each location receives its own copy of the parent campaign.
Step 3: Customize Content for Individual Locations
You can customize campaign content for a specific location without changing the content used by other shops.
- Open the parent campaign's family of location campaigns.
- Select the location you want to customize.
- Choose Edit content for this location.
- Make the necessary changes.
- Select Save for this location.
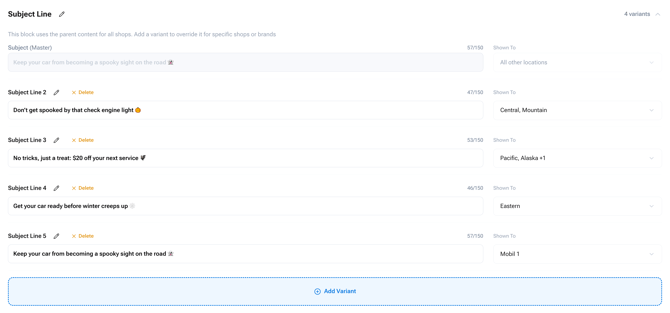
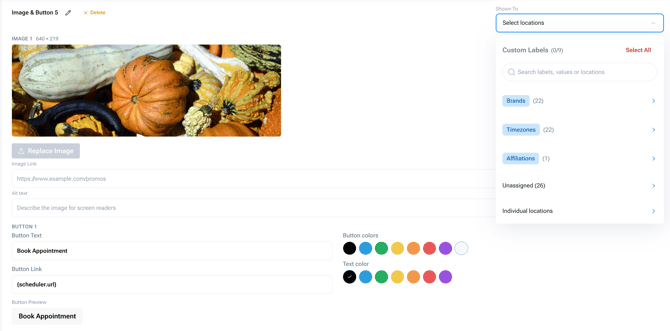
You can also create different versions of a content block and choose which locations receive each version.
For example, you might use the same holiday campaign across your organization but include a different offer or banner for selected shops.
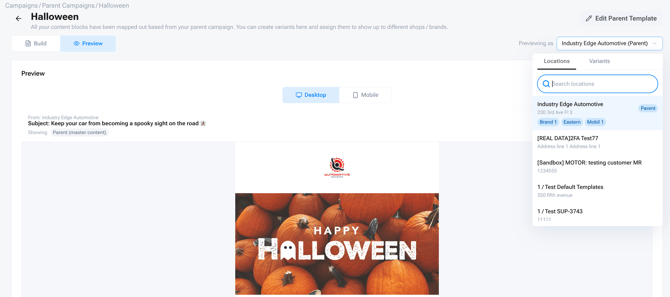
Preview each location's version before publishing.
Step 4: Publish Updates Across Locations
When you update a parent campaign, those changes are not automatically applied to its location campaigns.
To distribute changes:
- Open and edit the parent campaign.
- Select Publish.
- Review the preview showing which locations will be updated, are waiting, or will be skipped.
- Confirm the publication.
This lets you manage shared campaign content without editing every location individually.
Step 5: Manage Location Editing Permissions
Tenant administrators can control how individual locations manage their campaign copies.
Lock a campaign: Prevent a location from editing or detaching its campaign copy.
Detach a campaign: Separate a location's campaign from the parent so it can be managed independently.
Important: Detaching a location's campaign is permanent. Once detached, that campaign will no longer receive updates from the parent.