
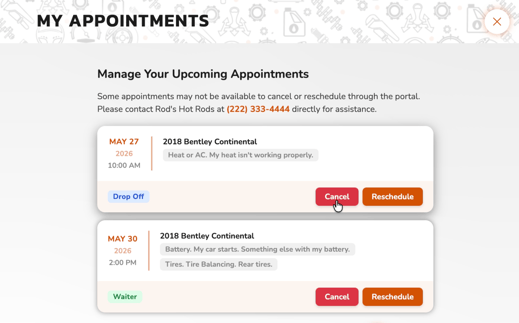
⚙️✅Access: Enabling the Booking Manager requires taking steps in both the AutoOps and Steer Dashboards; your Steer and AutoOps pages must be integrated. Follow all steps carefully to allow customers to cancel, or reschedule, their appointments.
The Booking Manager allows your customers to reschedule, or cancel, their booked appointments. This feature adheres to your availability, service settings, and capacity blockers.
Jump To:
How to Enable the Booking Manager: Cancel/Reschedule
-> Giving Customer's Access to the Booking Manager
How Cancels & Reschedules Appear in the Shop Management System
How to Enable the Booking Manager: Cancel/Reschedule
🚨 AutoOps must be installed on your website to utilize the Booking Manager.
In AutoOps,
-
Navigate to Settings > Scheduling Tool > Booking Manager.
-
Toggle ON the Booking Manager Enabled Button.
-
Complete the following settings to configure the booking manager and update appointment notifications to allow customers to manage their booked appointments. Be sure to Save after customizing each section.
I. General Settings:
-
-
Customize Appointments Page Message - this message will be shown at the top of the Booking Manager page that displays the customer's upcoming appointments; the default messaging will be used if left empty .
-
II. Notifications:
-
- Home Page URL - this setting is required, list your website URL. AutoOps must be installed on your website.
- Use Query Parameters - controls how parameters are added to the URL. If your website isn't picking up settings like auto show, try turning this off.
- Redirect Through Shop Website - if you turn this setting on, the link sent to customers will redirect through your website scheduler instead of the default domain (https://aops.cc).
III. Reschedule Settings:
-
- Enable/Disable Rescheduling.
- Rescheduling Cutoff (hours) - customers cannot reschedule within this many hours of their appointment.
- Allowed Appointment Types - exclude certain appointment types from being able to be rescheduled.
- Blocked Services - appointments containing these services cannot be rescheduled through the booking manager portal.
- Rescheduling Unavailable Message - shown when rescheduling is unavailable for an appointment. The default messaging will be used if left empty.
- Enable/Disable Rescheduling.
IV. Cancel Settings:
-
- Enable/Disable Cancellations.
- Cancellation Cutoff (hours) - customers cannot cancel within this many hours of their appointment.
- Allowed Appointment Types - exclude certain appointment types from being able to be cancelled.
- Blocked Services - appointments containing these services cannot be cancelled through the booking manager portal.
- Cancellation Unavailable Message - shown when cancellation is unavailable for an appointment. The default messaging will be used if left empty.
- Enable/Disable Cancellations.
V. Save your customizations.
⚙️✅ Required: Add the Booking Manager Token to your appointment related messaging, and to the Public Vehicle Profile in Steer to allow your customer's access to cancel/reschedule their appointments.
Giving Customers Access to the Booking Manager
Giving customer's access to the Booking Manager is easy, simply add the Booking Manager Token to your appointment confirmation and reminder messaging.
ℹ️ Note: If you are using Steer, you will add the token to your appointment messages in the Steer Dashboard. If you are not using Steer, you will add the token to your appointment messages in AutoOps.
-> Steer: How to Give Customers Access to the Booking Manager
-> AutoOps: How to Give Customers Access to the Booking Manager
Steer: How to Give Customers Access to the Booking Manager
In Steer, giving customer's access to the Booking Manager is easy. Once you have completed setup of the Booking Manager in AutoOps, you will notice the following changes in Steer that allow you to give your customers access to the Booking Manager.
Steer Automatically Adds the Booking Manager to the Following Areas:
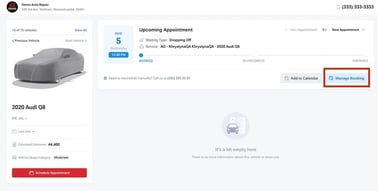
1. Public Vehicle Profiles & Digital Glovebox: Customer's can now manage their booking directly in these areas.
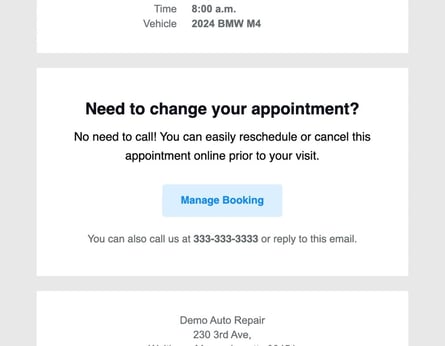
2. Appointment Confirmation & Reminder Emails: A Manage Booking box is added to the appointment confirmation and reminder emails whenever Booking Manager is on for your shop.
Manually Add the Booking Manager Token to Appointment Related Text Messages:
In Steer,
-
Navigate to Appointments > Notifications.
-
Click Manage Template on your Appointment Confirmation/Reminder.
-
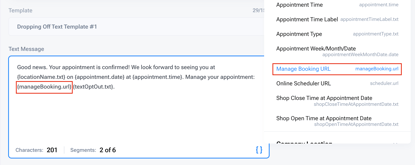
Add the Booking Manager token into the body of your Appointment Notifications that you want to include the booking manager link.
- If you do not allow cancel/reschedule for a certain appointment type (waiter/drop off) do not include the booking manager link in the notifications for that appointment type.
- 💡Tip: We recommend adding the token to your appointment confirmation message and your appointment reminder message.
New Booking Manager Notifications:
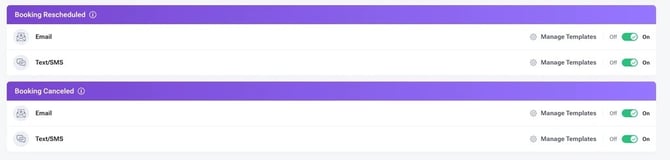
You will see two new notification types in Steer related to the Booking Manager: Booking Rescheduled and Booking Canceled.
These messages will send out to the customer when they have canceled or rescheduled an appointment to let them know their appointment changes have been updated.
AutoOps: How to Give Customers Access to the Booking Manager
In AutoOps,
-
Navigate to Settings > Notification Setup.
-
Copy the Booking Manager Token -> :booking-manager-link
-
Paste the token into the body of your AutoOps Appointment Notifications that you want to include the booking manager link.
- If you do not allow cancel/reschedule for a certain appointment type (waiter/drop off) do not include the booking manager link in the notifications for that appointment type.
- 💡Tip: We recommend adding the token to your appointment confirmation message and your appointment reminder message.
When customers receive their appointment notification texts, the booking manager link will now be included allowing them to manage their appointment.Example Text Language:
| Appointment Confirmation | Thank you! Your appointment with :shop-name is booked for :appointment-month-date-year at :appointment-time. To cancel or reschedule your appointment, click here :booking-manager-link |
| Appointment Reminder | Friendly Reminder: Your appointment with :shop-name is booked for :appointment-month-date-year at :appointment-time. We'll see you soon! To cancel or reschedule your appointment, click here :booking-manager-link |
How Cancels & Reschedules Appear in the Shop Management System
⚠️ Shop Notifications for Cancelled/Rescheduled Appointments:
You will receive email notifications for cancelled/rescheduled appointments. Check AutoOps Settings > Notification Setup > Admin > Input your email to receive new appointment emails.
Cancelled and rescheduled appointments may push to your Shop Management Calendar depending on the Shop Management System (SMS) you utilize.
Review the chart below to confirm which changes will push to your Shop Management System Calendar.
| Key: |
✅ = Changes made push to the SMS X = Changes made do not push to the SMS |
.png?width=670&height=677&name=CancelReschedule%20SMS%20Chart%20(1).png)